

Do you know the tips for Sprinkler system repair? Throughout the year, your sprinkler system performs an excellent job of keeping your grass and surrounding plants fresh. Temperature variations, water pressure, tree roots, and burrowing animals are all factors that might cause damage to an outside system.
Furthermore, the delicate electronics in any in-ground automated sprinkler system might malfunction over time. Valves and hoses, which are frequently made of lightweight ABS, poly, or PVC, are prone to cracking, crushing, and breaking.
However, this is counterbalanced by how simple and affordable it is to sprinkler system repair. Replacement hoses, tees, elbows, and valves may be purchased for a few dollars each. Tubing that has been buried seven or eight inches deep is simple to remove.
Individual sections or pieces can be fixed or changed without having to remove the complete system. To keep your sprinkler in good operating order, follow these guidelines for sprinkler system repair.
5 Tips For Sprinkler System Repair
Follow these sprinkler system repair tips to maintain your sprinkler system in good working order.
Materials and Tools:
- small shovel
- spade
- easy-out pipe removal tool
- toothbrush
- cup
- gloves
- risers
- sprinkler heads
- plumbers’ tape
Instructions:
1. Use tiny shovels to dig around the sprinkler head or heads that aren’t working. Remove the remaining piece of earth with your hands, being careful not to harm any underground pipes.
2. Disconnect the sprinkler head from the riser. To remove the riser, use a “easy-out” pipe removal tool.
3. Examine the riser for any damage. When they’re damaged, it’s usually because someone walked on the sprinkler head by mistake.
4. Replace any broken or damaged parts. If you need to replace a sprinkler head, be sure it has the same spray pattern as the old one.
5. Wrap the ends of a new riser with a plumber’s tape before installing it.
6. Using a tiny cup, scoop out any water in the hole. Using a toothbrush, clean the spout where the riser is attached.
7. Thread the new riser in place, taking care not to strip the threads. Continue to fix any more sprinkler heads that aren’t working. Sprinkler heads should not be reinstalled until the system has been purged.
8. Fill the tank with water and flush the system. Replace sprinkler heads, patch holes, and turn the system on and off.
Changing a Sprinkler Valve
If your sprinkler heads aren’t popping up or turning on, or if there isn’t enough water pressure, the issue might be with the valves farther up the line. The valves work like traffic lights, opening, and closing as needed to direct water to certain sections of the grass. When a valve malfunctions, it affects the entire system.
Valve replacement can be a time-consuming task that necessitates cutting the PVC pipes that run-up to the valves. A separate valve set is not included in certain sprinkler sets. Instead, the water is sent through a single automated timer box and then through the sprinkler heads’ pipes.
Replacing the Solenoid on a Faulty Valve
If you’ve eliminated the possibility that the sprinkler valve isn’t turning on due to a lack of water, the problem might be a solenoid. A solenoid is a tiny door that opens and closes in milliseconds within the valve. While replacing a solenoid may appear to be a difficult task, it is not. Replacement solenoids are available at most home centers, hardware stores, and, of course, internet sellers.
- It takes roughly five minutes to complete the sprinkler system repair.
- Remove the two wires from the defective solenoid after turning off the water and removing the electricity.
- To remove the malfunctioning solenoid, turn it counterclockwise.
- Turn the new solenoid clockwise to replace it.
- Connect the two wires in the same manner as previously.
Sprinkler System Winterization
Because your sprinkler system isn’t needed during the colder, wetter months in your area, it’s better to turn it off for the time being.
To effectively winterize your sprinkler system repair, follow these steps:
- Do not use the timer if it is under pressure.
- Drain and store the timer in a clean, warm, and dry spot after removing it from the hose bibb.
- To avoid freezing damage, drain all water from the system.
- Using the system’s blow-out port, blast away any residual water.
- (This task necessitates the use of a compressor.)
Locate a Sprinkler Line Break
Finding breaks in the in-ground line is one of the most difficult sprinkler system repair issues. You’ll need to determine the exact breakpoint in order to mend that location if you don’t want to pull up all of the buried lines. Finding the leak necessitates keen observation and the pursuit of circumstantial evidence.
Water flowing up from below might be indicated by pooled water that isn’t near to a sprinkler head:
- The grass might be moist but not drenched at times.
- At night, turn on the sprinklers for roughly an hour.
- Wait until the water has evaporated later in the day.
- With your palm near the suspected air, feel the grass for any signs of moisture.
Take a look at the chart
Look for taller grass or grass that is greener than the rest of the area. This might indicate that the water underneath these places is providing greater nutrients.
How to Repair a Leaking Black Poly Pipe
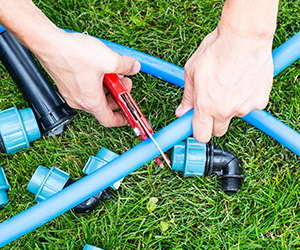
When a sprinkler line leak is found in the ground, you must first dig to find it. Carefully dig around the suspected leak using a spade or flat-bladed shovel. The majority of lines are shallow, but some might be as deep as eight inches. In certain circumstances, they might be only two or three inches down.
You’ll need to cut away the broken piece of the line for sprinkler system repair. A flexible polyline is used in several common sprinkler kits. Take this to a home sprinkler system repair store to get the right materials for the job. You should be able to locate a replacement line as well as brass or plastic adapters to connect the new line to the old. To execute this work, you’ll need the appropriate tools and clamps. Before you begin, make sure you get them from your local provider.