
")
Firebase is a platform introduced by Google to create mobile and web applications. Firebase helps the developers to transform the user experience. You don’t need to manage servers and write APIs as Firebase will be your server, Flutter App, and data store.
Also, it is all written in generic form so you can customize it as per your requirements. Although you will need other features of Google cloud for your advanced applications like Flutter App, google firebase still gets you pretty close.
In this article you will find how to add firebase products to a Flutter App. Initially, the company was incorporated in the year 2011 as an independent company, and later on, in the year 2014, Google acquired this platform. Currently, Firebase has grown up into a next-generation app-development platform on the google firebase cloud platform.
Step By Step Guideline to add Firebase to a Flutter App
1. Top Features of Firebase:
- Fast app development without managing the infrastructure
There are various functionalities Firebase provides to you such as analytics, messaging, databases, and crash reporting so you can complete the task and move on to your next task of focusing on your users.
- Trusted by Top apps as Backed by Google
Firebase is built on Google infrastructure, and therefore the credibility is top-notch. Backed by Google, this platform scales automatically for even the largest apps.
- Products diversity and inclusivity
There are various features/products introduced by Firebase, and they work great individually. Also, as they share data and insights, they work even better when used collectively.
- Adding Firebase to your Flutter App
The following guide will show you how to add firebase products to a Flutter App.
2. Pre-requisites:
- Installing the editor/IDE
- Ensure that your flutter app is suitable for iOS 8 or later
- Set up an iOS simulator or a physical iOS device in order to run your app
3. For Cloud Messaging, the following tasks must be Completed:
Setting up a physical iOS device. For the Apple Developer Account, you need to obtain an Apple Push Notification Authentication.
In Xcode, enable Push Notification under App > Capabilities. You can use either a physical iOS device or the iOS simulator for all other firebase products.
For your operating system, install flutter along with the following:
- Supporting Libraries
- Flutter SDK
- Platform-specific software and SDKs
Now using your Google account, you need to sign in to Firebase, In case you do not have a flutter app, you can complete the Get Started: Test Drive for creating a new Flutter using your preferred IDE/Editor.
Step 1: Creating a Firebase Project
Firstly, you need to create a Firebase project to connect to your app before you can add Firebase to your flutter app. You can visit Understand Firebase Projects on the Firebase official website for learning more about Firebase Projects.
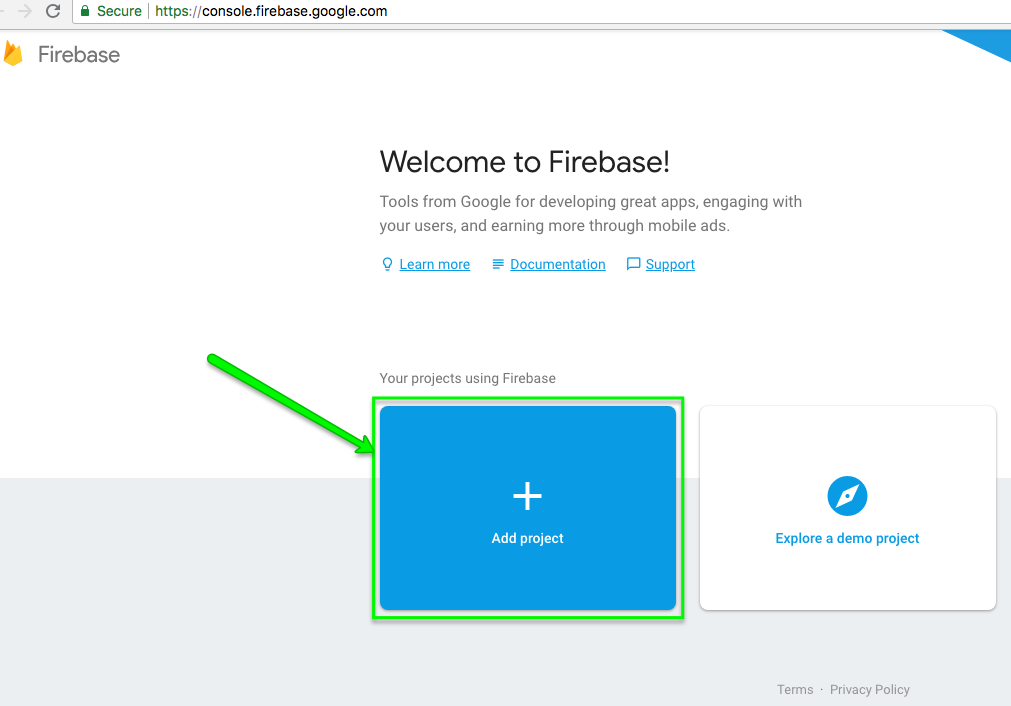
Select the Project name by clicking Add Project in the firebase console. In case you already have a Google Cloud Platform Project, you can opt for the project from the dropdown menu for adding Firebase resources to the particular project.
If you are developing a new project, you can edit the Project ID (Optional). A unique ID is automatically assigned by Firebase to your Firebase project.
Click Continue.
Click Create Project, and if you are using an existing Google Cloud Platform, you can click Add Firebase.
Firebase assigns resources for your Firebase project automatically. As soon as the process is completed, you will be transported to the overview page for your dedicated firebase project in the firebase console.
Step 2: Register your app with Firebase
If you are releasing your flutter app on both the platforms – iOS and Android, then register with both the versions of your app with the same Firebase Project. These are the steps to which you need to follow in order to perform the registration successfully:
Click the iOS icon at the center of the Firebase Console’s Project Overview Page for launching the setup workflow. In case you have already done that, click Add app to display the platform options.
In the iOS bundle ID field, enter the bundle ID of your app. No, from your open project in Xcode, you need to find this bundle ID. In the project navigator, select the top-level app, then access the General Tab. The iOS bundle ID is the Bundle Identifier value. Enter other app information such as App Nickname and App Store ID.
Click the Register app.
Step 3: Add a Firebase Configuration File
In order to obtain your Firebase iOS configuration file, you need to click on Download GoogleService-info.plist.
- Downloading of the Firebase iOS config file can be done at any time.
- Ensure that the config file is not appended with any additional characters.
Transport the file into the runner/runner directory of your flutter application by using Xcode. No click next for skipping the remaining steps in the Firebase Console Setup Workflow.
Continue to Add FlutterFire plugins.
Step 4: Adding FlutterFire Plugins
Plugins are used by Flutter for providing access to a list of platform-specific services like Firebase APIs. Plugins include code specific to the platform to access the services and APIs on those platforms.
You can access the Firebase with the help of different libraries like Real-time Database, Storage, Analytics, or Authentication. Firebase plugins are a set of plugins provided by Flutter, and it is termed as FlutterFire.
Each Flutter Fire plugin is applicable for both the platforms – iOS and Android. This is because Flutter is a multi-platform SDK. So if you add any plugin to your flutter app, it will be utilized by both the versions – Android and iOS.
Available FlutterFire Plugins:
- Cloud_firestore
- Cloud_functions
- Firebase_auth
- Firebase_admob
- Firebase_analytics
- Firebase_crashlytics
- Firebase_core
- Firebase_database
- Firebase_dynamic_links
- Firebase_storage
- Firebase_remote_config
- Firebase_performace
- Firebase_ml_vision
- Firebase_messaging
Steps to Add FlutterFire plugins to your app
- Open your pubspec.yaml file from the root directory of your flutter app
- Add the FlutterFire plugin for the firebase core SDK. All apps need this firebase_core plugin.
- Add additional FlutterFire plugins for using specific Firebase products
- Run flutter packages get.
Running the application
In order to test the application, connect it to your emulator or physical Android device.
Click on Build and Run.
And that’s it! Your Flutter app has been registered and configured to use Firebase.